Shop Projects About Contact
Showing posts with label My House. Show all posts

Thursday

My Sewing Room :: Updated!

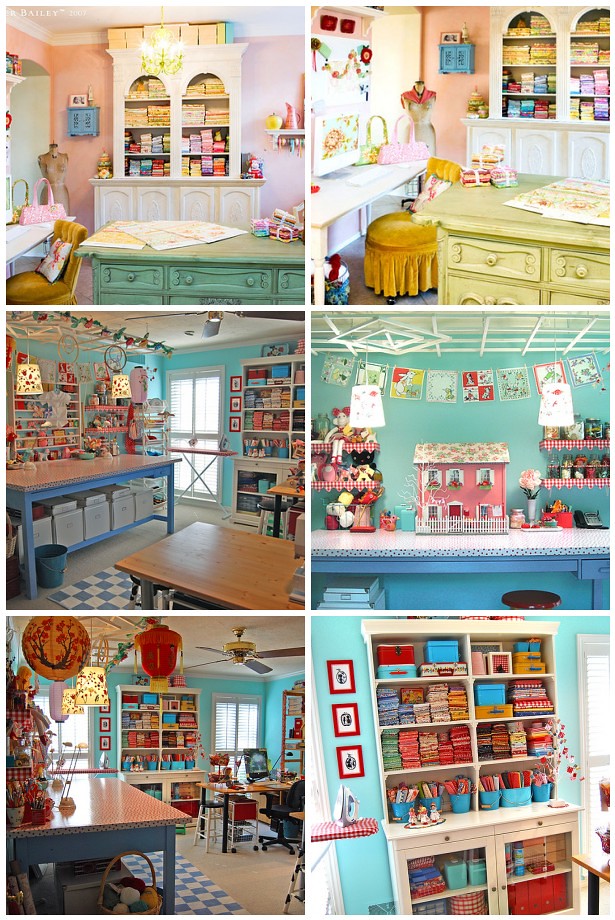
It's no secret that I love taking a peek into other's creative havens to check out their setup and process. It's fun to see how other people lay things out and get inspiration from it.

I recently updated my space with a couple of inspiration walls I made myself, and they have completely transformed my space. I actually featured my big sewing room update exactly a year ago, but oh how things have changed, yet again!

Come, take a walk with me...

1446 - Copy
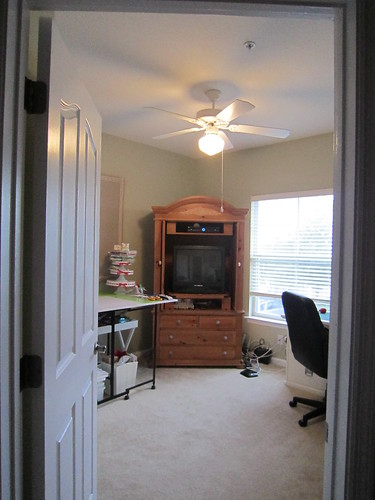
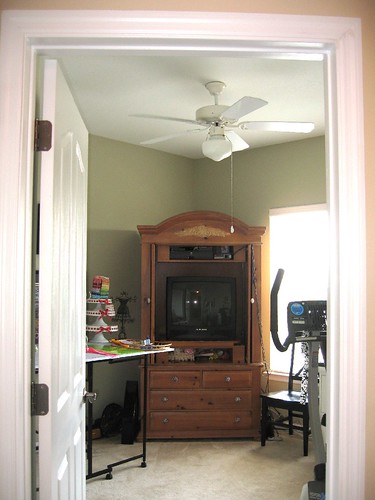
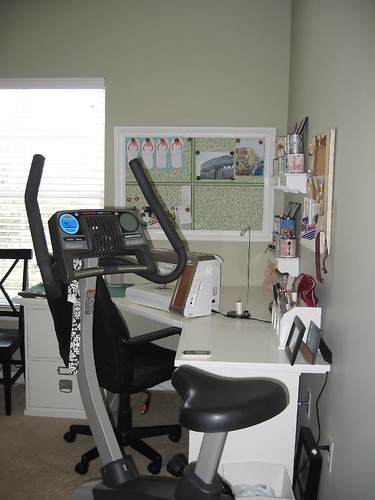
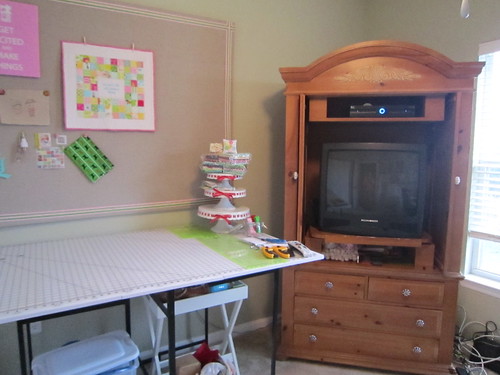
This is the view from the hallway.

1459
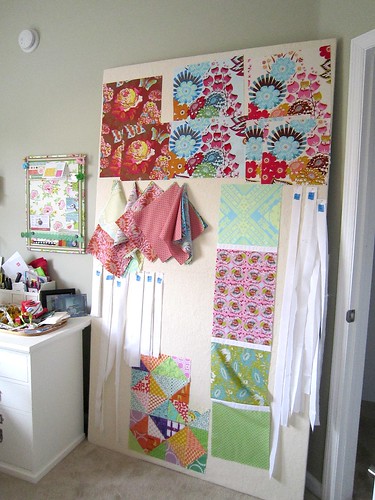
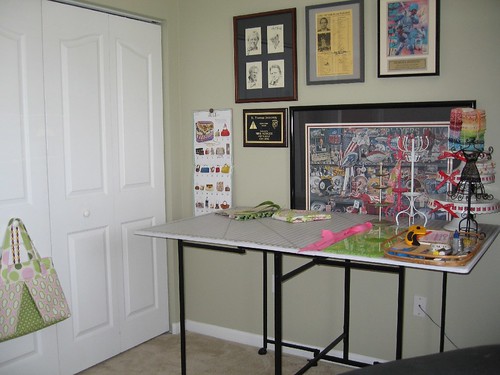
My new design wall!!!
Since I don't actually have space to install it on a wall, I've made it so it leans. There's actually another one behind it, as well. It's made from lightweight insulation "R-Mat" board you can find in the construction section at Home Depot. It's some type of foamy styrofoam, so it's really easy to move when needed, plus it also takes pins really well, in case I need to post lots of items, like the sashings you see up there now.

I've been working on that LouLouThi quilt and actually spread out both boards against one wall so I could create the layout of the quilt. Then when I'm done, they can go back to their home here. Easy as that!

1451 - Copy
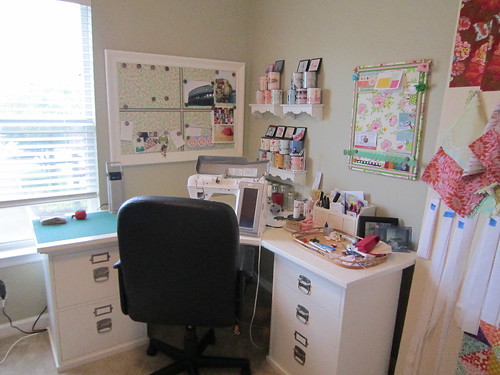
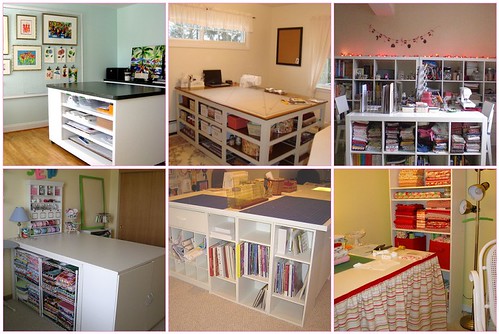
That's the main work area, which has been greatly enhanced with the easy access design wall. I used to have to keep all the "in-progress" blocks over there by the window, but now the new wall saves all that space!

1453 - Copy
This little flowery board is also another new addition. I got one of those magnetic dry-erase boards from Wal-Mart for like $6, then wrapped and staple-gunned the fabric and ribbon. So easy and pretty!

1449 - Copy
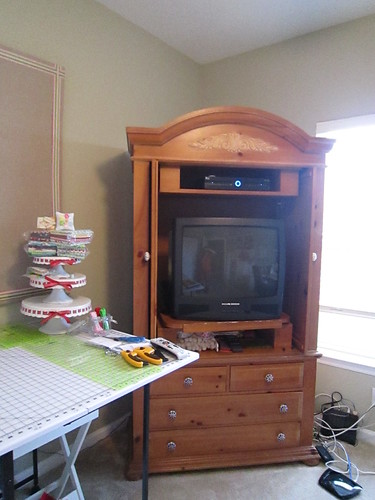
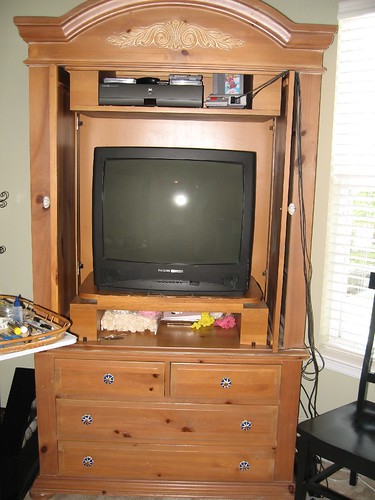
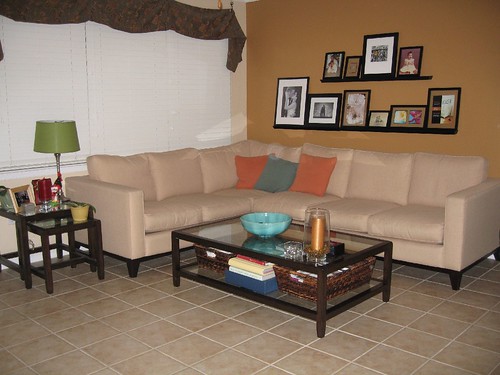
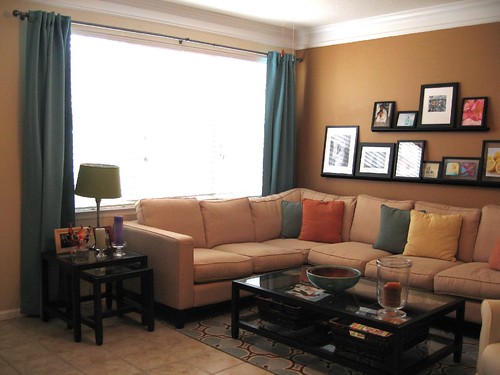
Entertainment corner.
I always have on either trashy tv or a movie to keep me company. My dog, Seamus, also keeps me company. He usually hangs out over there by the window and looks out through that crack I keep open for him...I call it his "peeking spot."
(And I truly detest all those wires, but this is technically the "office" so that's where it's all set up.)

1452 - Copy
Coming right around....

1448
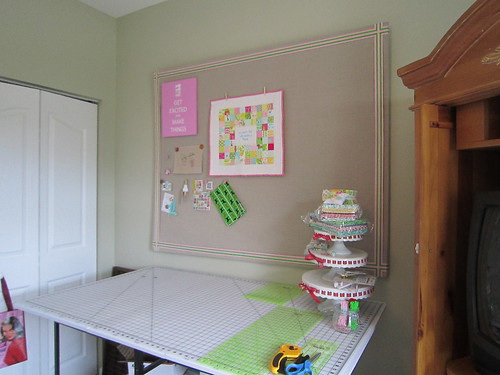
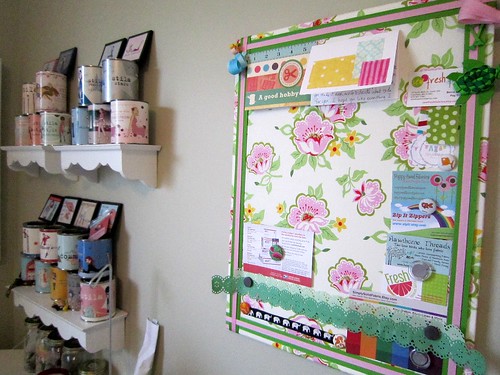
The new inspiration board!!!
I was originally planning on just hanging stuff up on the wall, willy nilly, but then I didn't want all those holes in my wall. And since nobody makes what I wanted, and what I want is usually specific and detailed, I made my own!

I took a 4' x 5' sheet of brown hard-board, then topped it with 2 layers of cork, available by the foot from a big roll at Home Depot. I attached all the layers using an industrial tube of all-purpose glue from the paint department. I then wrapped it in linen, framed it in my favorite combo of pink and green grosgrain ribbon, and stapled it all to the back. To hang it, I just installed a picture-wire kit to the back. It ended up being about $60, including all materials. Not bad!

1451
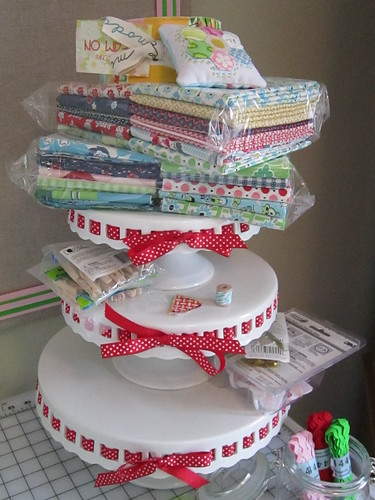
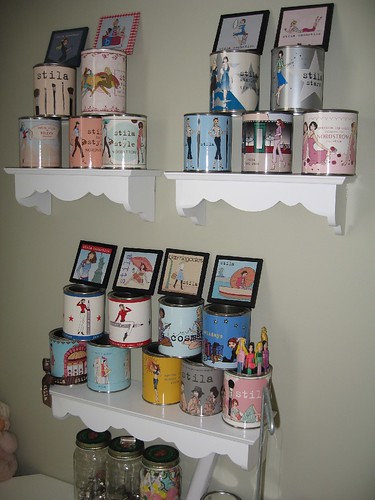
This is like my little shrine, cake stand tower.
Up there right now I've got my 1/2 yards of DS Quilts, Dream On jelly roll, and the pincushion gorgeousness from Crystal and the Urban Home Goods Swap on Flickr. Thanks Crystal!!!

1453
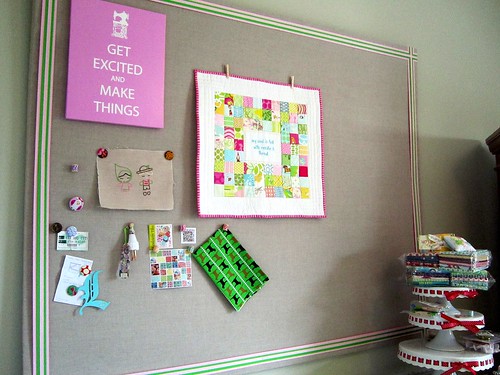
The board! I keep adding things every day.

Urban Home Goods :: mini quilt
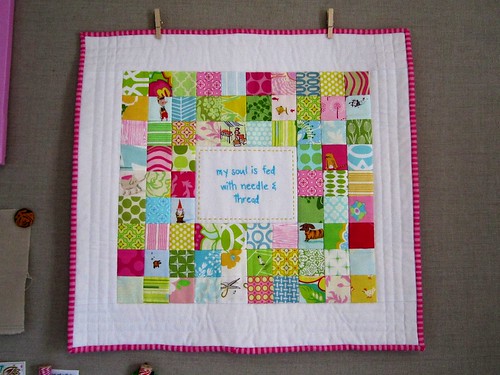
Pretty much the whole reason I needed an inspiration wall, to pay homage to this piece de resistance, the mini quilt from Crystal and the UHG Swap. LOVE LOVE LOVEEEEEEEEE this quilt!!! She totally nailed it with the saying....I was like, my soul IS fed with needle and thread! It's safe to say it's on the short list of "if my house were on fire....."

1457
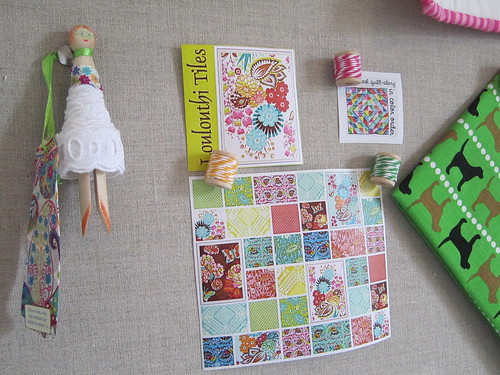
Here you see my little clothespin doll from Liberty, a souvenir from my trip to London. I've also posted printouts of the quilt-alongs I'm currently in, minus Farmer's Wife and a couple of skill-builder ones. It helps me remember at a glance what the heck I'm up to! I also got the dog fabric b/c my baby, Seamus, is a black lab, so I'm sure I'll be making some great pins with this.

1456
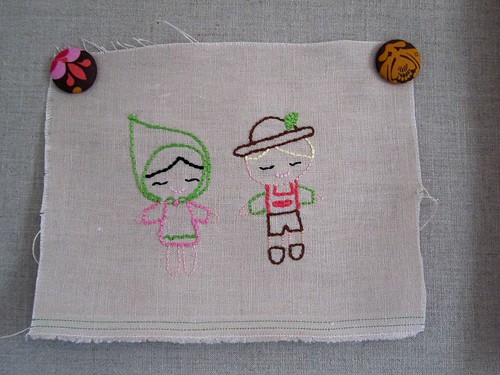
One of my first embroideries, just for fun. They look like Hansel & Gretel!
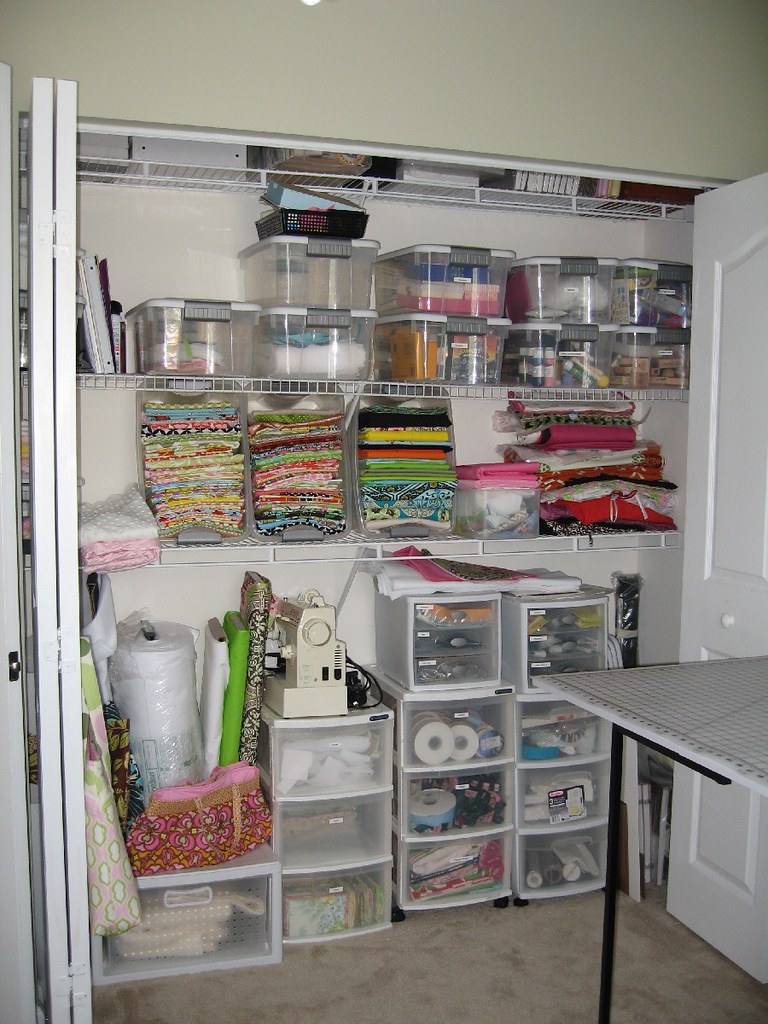
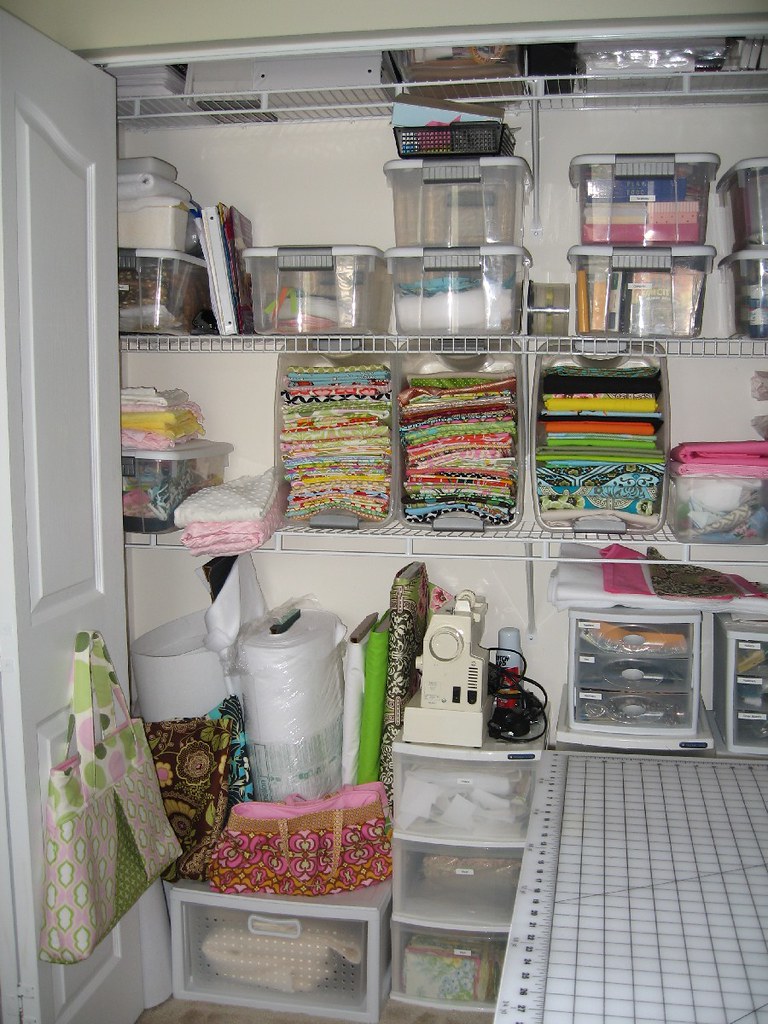
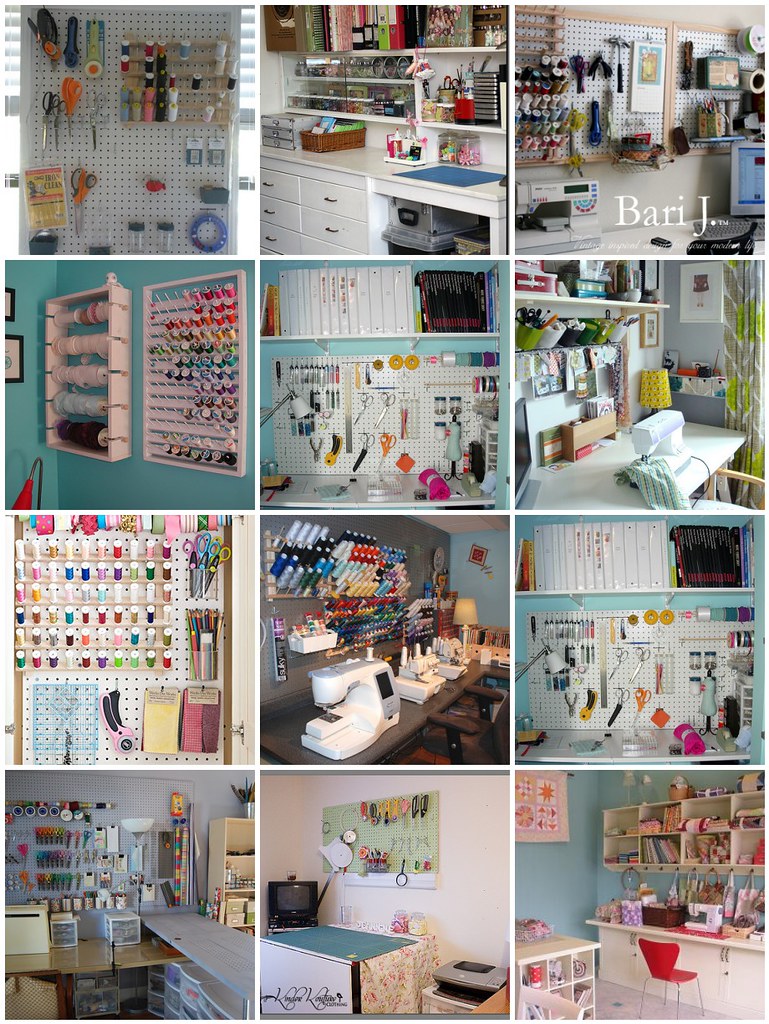
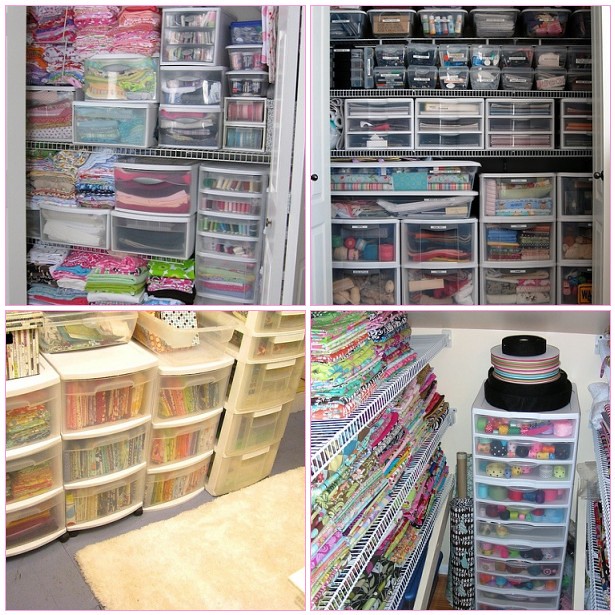
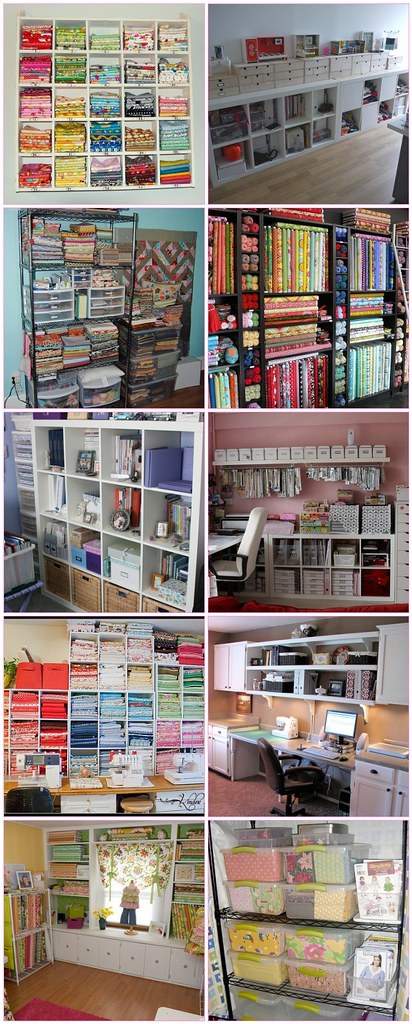
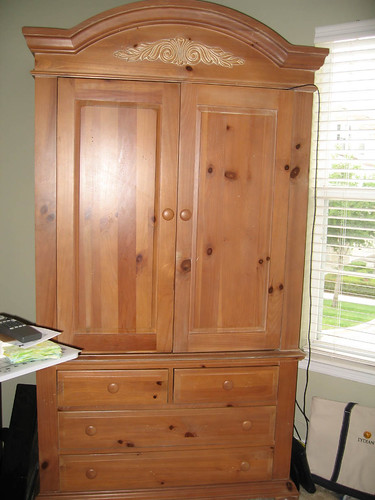
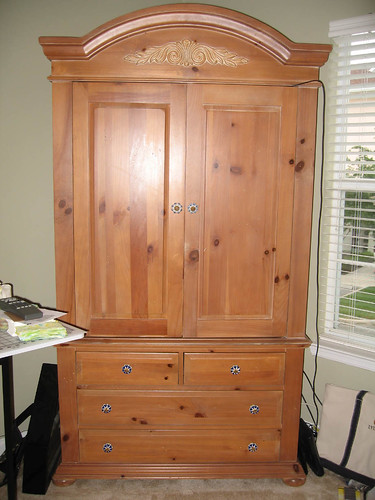
Sewing Room 14
The supply closet!
This just underwent a teeny tiny organization, so it'll change, yet again, from this picture. Everything is labeled and in its place. Soooo helpful when you have this many craft supplies!


Thanks everyone for checking out my sewing space!

Friday

Thread Storage

Cheryl over at Naptime Quilter has another one of her great link-ups, this time about thread storage. I'm all about the eye candy and making things pretty, but when it comes to my thread, I'd really much rather keep it dust free and readily available within reach. So all my thread is lined up by color in my desk drawer. It's literally less than an arm's length away from my chair when I'm sewing, so if I need to change colors or reach for a new bobbin, it's right there.

I've always admired those gorgeous spool racks and thread displays like the ones below, but I don't find them as practical. If I hung them on the wall, I'd have to get up from my chair and reach for them, plus they would take up precious wall space that could otherwise be used for a bulletin/planning board, inspiration gallery wall, or design wall.

Thread drawer
My thread drawer, all lined up.

Bobbin box
My bobbin box; lives in my thread drawer. This is a little plastic box with latching lid, available at any JoAnn's or Michael's. About $3.

Thread Rack and Lace Rack - Northern Wall
Gorgeous. Via.

Spool Rack
Vintage love. Via.


{How do you store your thread?}

Thursday

Check me out!

Jackie over at Sweetie Pie Pumpkin Noodle is doing a Vanity Week featuring fabulous vanity displays and today she featured little old me! Run, don't walk, to go check it out!

Friday

Sewing Room Redo: the Big Reveal!

Here it is, the big reveal! Hopefully after looking at all the beautiful spaces I've featured all week mine won't pale in comparison. I had some family visit recently, so that was the true motivation behind the reorganization. In true "gung ho" form, I was up to my knees in bins and supplies before I thought to take a before picture--I'm so crazy that I almost put everything back in its previously messy state just to take a picture! But I trudged forward and have ended up with a well-organized room that makes me smile. I hope you enjoy the tour!

Sewing Room 2
Here we are at the doorway. It's just down the hall from our bedroom, so it's conveniently located and I'm never too far away from the hubs.

Sewing Room 3
This is the right-side wall. I have the stationary bike in there, since I exercise and watch tv on it at night.

Sewing Room 4
Moving to the left, we find the armoire and cutting table.

Sewing Room 5
Here is the cutting table on its own. I bought it at the JoAnn's Black Friday sale last year and I will say that my visits to the chiropractor have definitely gone way down! Working at the proper height is a real back-saver.
The sports pictures can be explained by simply telling you that I put them up for my husband. Although the room is very technically 95% girly sewing stuff, the pictures on the wall allow me room in the argument that I took over an entire room and that he has nothing in the whole house that is his. It is my saving grace in that once-in-a-blue-moon "discussion." I'll put up a supply pegboard and some cute sewing prints in the next house.

Sewing Room 6
This is my sewing corner where I end up spending most of my time once things are prepped. I've decorated it super girly, so I love looking at it whenever I'm over there.

Sewing Room 7
This is my Stila paint can/palette collection. I started wearing Stila makeup in college and began collecting these. Each can is from a different store opening or is a special edition for an event or holiday. I even have a few things up there acquired from limited edition Australian & Japanese releases. I got them all by either buying my makeup or swapping with other collectors.
(Incidentally, the little string dolls at the bottom right are ones I made when I was little. I found them at my mom's the other night. I would glue toothpicks together into a body shape and wrap them with embroidery floss to dress them up. I treasure them.)

Sewing Room 8
This is my baby. My Baby Lock Ellegante sewing/embroidery machine. It happened to be in the dealer's shop when I went by to check out machines one day last summer. I had been in several times and was looking at another Baby Lock several notches down from this one. It had come in that day on a trade-in and I happened to have had perfect timing. I very nervously signed the papers and financed it. I won't say how much it was, as my husband might have a heart attack, so let's just say it was less than half of retail and a very good deal. :)
I am now officially spoiled and could never again live without the automatic thread-cutting button, among other things.

Sewing Room 9
Where it all happens! All my options tucked into pages and pages of touch-screen buttons.

Sewing Room 10
My bulletin board that I made myself. I ripped up an old Lilly Pulitzer euro sham, wrapped it around foam board, added the layered ribbons, inserted into loose white-washed frame, backed with pressed wood, and voila!
I have my orders on the top, with inspiration photos and pretty views elsewhere.

Sewing Room 12
I've gotta have some background noise, so trashy reality tv is usually playing while I work.

Sewing Room 14
The real reveal!!!
This is my labor of love! I desperately needed to reorganize and categorize. I had way too many fabric cuts, notions, and more that were lost in corners and therefore useless. Anyone else have that problem?
I put my everyday fabrics in bins, but so I could see them. If I need to take any of them with me, I just grab the bin and go. Easy peasy. I bought a few more bins and lots of drawers, and labelled everything. I have stash drawers, "special" stash drawers, notions and supplies, scrap drawers and more. Organization abounds! Click through to the Flickr pic to see all the notes and find out which bin is which.

Sewing Room 1
Another view, peeking into the corner of the closet.

Thanks for stopping by and for taking the tour of my big sewing room redo!
Leave a comment so I know you were here and let me know what you think.

What are your favorite organization tips?

Thursday

Sewing Room Redo: Famous Studios

These are some really cute sewing studios. The first is unmistakably Heather Bailey's room. Such a gorgeous space to create in...just look at those gorgeous and colorful stacks of fabric! She is definitely in my top 3 of fave designers, as she certainly speaks to my craving for bright colors.
The next room isn't from a big designer, but is more famous on Flickr. It is from *jenny b allsorts and is fabulous! Red and aqua and total eye candy. She has a great big cutting table with excellent storage underneath. The major gorgeousness is in the fabric buffet. Great big stacks and stacks of colorful fabric, buckets of bundles, and more. It's definitely my aspiration to have a studio this big in my next house. Nice work!

Favorite "Famous" Sewing Rooms

Wednesday

Sewing Room Redo: Supply Walls

There's nothing like using vertical space to maximize storage! Most of these favorites take advantage of that great pegboard system available at Home Depot. I haven't taken my own room to that level just yet, but as I continue to amass quilting rulers, scissors, and rotary cutters, I definitely see it in my future.

Favorite Supply Walls

Tuesday

Living Room: Before & After

Per my bestie, Raygan's, insistence, I'm posting a before & after of my living room. And in the spirit of this week's room reveal, I figured it was good timing.

Living Room Before
Before

Living Room After
After!
I think the only major difference you can see is that I added the rug and drapes. I'm loving the serene blue of it all. I lusted after that Pottery Barn rug for a long long time. I waited for a sale, and then it sold out, then a year later it magically appeared on sale again. The drapes were a steal at $60 for the pair on Overstock. Love that site!

For all my sewing peeps out there, any suggestions for fabric to make new pillows?

Sewing Room Redo: Closets

These are really and truly the inspiration behind my sewing room redo, especially the top two with all the bins. As soon as I saw these, I was immediately drooling. I mean, talk about a place for everything and everything in its place! It's a great way to organize all your supplies and stash, and to protect them from dust and other yuckies.


Favorite Closets

Monday

Sewing Room Redo: Shelving

So if you haven't already figured it out, I'm an organization nerd. But as I am with most things, I'm an interesting hybrid; I'm very organized, but I'm also very lazy. So things don't always stay as organized as one might hope. I always take those personality tests and decor style quizzes and I always always always come up right in between 2 different results. I suppose it's my wretched flexibility!

Below are some of my favorite shelving options from my Flickr favorites. You might notice that many of them have that fabulous Ikea Expedit shelving. So handy! I love how there are so many options for your own room configuration, and apparently they sell modular baskets and containers that fit perfectly in each cubby. Alas, my room has no space for that right now, so maybe in my next house. I also snuck in a couple of pics from actual shops...that's not really sewing room shelving, but hey, a little fabric eye candy never hurt anybody.

Favorite Shelving

Sunday

Sewing Room Redo: Tables

I just finished reorganizing my sewing room and couldn't be happier. New storage bins, labels, and I love it all! All this week I'll be featuring some of my favorite sewing rooms from Flickr, with a final reveal of my own room at the end of the week. I can't wait!

I'll start off by featuring some of my favorite cutting/work tables. I know that my life (and my back!) haven't been the same since I got mine.


My favorite cutting tables

Wednesday

Before & After: Ironing Board

I am super excited about this little remodel. I couldn't stand the sight of this yucky old cover any longer and decided to do something about it.
Ironing Board cover - before
Here is the before of the standard-issue and horribly scorched original cover. I confess I added the piles of Nicey Jane to the picture to make it seem just a touch less yucky...did it work?

Ironing Board cover - after
And here is the fabulous after! I love it! It's so fresh and bright...quite an improvement. I lined it with muslin and installed a drawstring to make it nice and tight. Now I think the only thing missing is a layer of cotton batting and some Insul-Bright for the heat to upgrade the padding.

Ironing Board cover
This is how it will look most of the time propped up in the closet when it's not in use. So much better!

Tuesday

Thank you: Before & After Edition

A big shout out to my friend Ken, who came by with his fabulous wife Amanda yesterday to cut down some drawer pulls for me. Without him, this transformation would not have been possible ;)
A further shout out to my best girl, Jill, who gave me the armoire in the first place. She was redecorating (she does that a lot, so if I were you I'd go hang out near her trash pile) and generously passed it along to me. In doing so, she made the childhood princess in me very happy...I always wanted one of these.

Armoire - before
Before

Armoire - after
After!


Armoire - after

Armoire - closeup
How cool are these knobs?! Just another painted set from Anthropologie you say? The thrifty girl in me will have nothing of their overpriced wares! I got all of these for just $2 each from a booth at the Brooklyn Flea Market! I take an annual NYC trip with my dad and I insisted we cross the bridge to check this place out, and boy am I glad I did.

Thursday

House Tour: My Master Suite.

Welcome to my home! As this is my favorite room, I shall begin my little House Tour series here.


Ah, my beautiful, comfortable bed. That's my side, over there on the left. I was inspired by the hotel vibe. I love the puffy shams and swing arm lamps they have...something about the organized look makes me smile. I like to think that this decor reveals two things about me: 1. I like bright, cheery looks 2. I'm a Pottery Barn whore.
Everything is from Pottery Barn in this pic: Lewis Slipcovered Headboard, Heidi Stripe Duvet & Shams, Hudson Wide Bedside tables, Chelsea Swing Arm Sconce Lamps w/Bisque shades.


Here's another view of my bed. I'm not quite certain what to do as far as bedside and above the bed art goes. For above the bed I've been thinking either one large piece or 3 small pieces would work well. I'm been combing through Etsy, but can't find anything yet. I tend to lean toward photography and Impressionist art. I saw this piece at ZGallerie, but am afraid it might be too dark or big. Any suggestions?
(And if you think this looks sparse, you should have seen it sans duvet and any furniture and no accent wall. De-press-ing!)(UPDATE: Here it is before! I found a pic.)


I think this pic from O at Home resembles my general look, minus the leather and layering. I would love to find a piece of that proportion to put over my bed. I'm hoping to have some luck at Artigras in February.


Moving in a clockwise fashion, this is my dresser (that's my bathroom in there...perhaps another tour). It's oversized, reaching up to my 5'3" upper stomach area. I got it for a steal at my local furniture warehouse AND I used my recently gained Tupperware commission to pay for the whole thing. So very technically it was free :)


This is my jewelry board and frame tray. My mom got me the bulletin board and I decided having all the baubles out in eyesight is much easier than storing in a drawer. I got the idea for the tray made from a frame from Real Simple a year ago. Since I took this picture 2 weeks ago, I have since found a gorgeous pink paisley scrapbook paper to fill the frame.


Closeup of the jewelry board. Lots of Banana Republic, homemade, and NYC street finds represented.


Closeup of tray. My 3 perfumes in constant "mood" rotation. Some vintagey looking frames behind my grandmother's old pillbox and powder compact. Very classy lady. Miss her.


Continuing around the room, this is the view from my bed. The door to the left leads to the hallway, while the door on the right is my hubby's closet (mine is through the bathroom, weird, but realllllllly happy to have his/hers). The watercolor is by Chris Hartsfield, an amazing watercolor artist I discovered at a festival a few years back. It is of a Stargazer Lily, my favorite flower, and was given to me by my grandmother, my favorite person. Very appropriate. Hopefully this Christmas we'll be replacing the tv with a nice LCD flat panel and a new stand. What I'd love on the right is a pretty club chair with a simple floor lamp to have a little reading/relaxing nook. But that's a whole other budget, unless I can find something thrift.


Thanks for looking. I hope you enjoyed the tour. Please leave any comments/suggestions/criticisms(but not too many of those criticisms) in the comments. Please do drop by again soon!